The Florence Files: A transitional style...
Linen Sottana using period construction techniques.
Recreated by La Signora Onorata Katerina da Brescia.
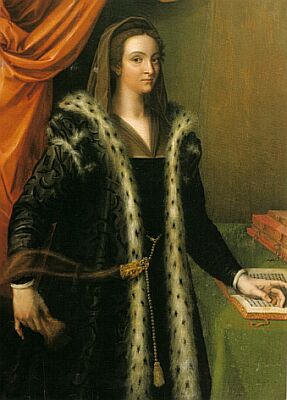 |
Inspiration: Sottana
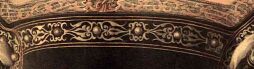
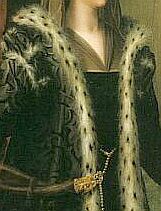
Cristofano dell Altissimo's Guilia Gonzaga in mourning, 1535.
This sottana (petticoat/dress) more closely resembles the 1540-50 Florentine styles though 5-10 years earlier. I prefer this 'transitional' style, as it has a higher waistline to the later 1540's styles.
While trying to recreate the dress, I will be using authentic tailoring construction techniques
used at the time. The exception is the use of linen, for Adelaide
summers (35-40 deg Celcius plus) and the use of machine sewing for
major seams. All visible stitching will be handsewn.
This sottana is also to be made of materials I already have in my wardrobe.
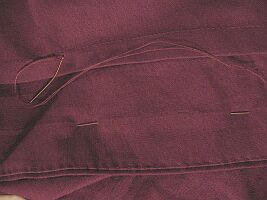
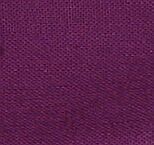
| Right is the sample of linen
material for the sottana. This will be lined with wool felt
purchased from Spotlight, some time ago. The lining will be of the same
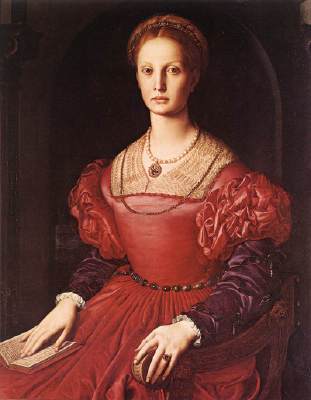
linen. Far right is a sample of the colour from the sleeve in Portrait of Lucrezia Panciatichi 1535 by Bronzino.
|
 |
 |
|
Method: (diary)
To achieve my goal, on this outfit, I will have to use the following techniques:
- imbusto of four layers - visible material/ wool felt/ linen/ lining of linen or satin
- handsewn silk covered eyelets
- spiral lacings on side-back openings on imbusto
- lining hemstitched to main imbusto
- lining or strip of decorative (cut) edging to neckline, cuffs and hem.
- hem stiffened with wool felt, decoratively edged strip covering this.
- pin tuck above the hem
- bias strip hem stitched to skirt opening at side back.
- garding
- sleeves
with small decoration on head(so Zimarra can be worn over to complete the
outfit)and slashing, tied or buttoned onto the imbusto.
- patterns based on Eleanora's burial gown and Alcega's Tailor Book
- The colour is consistent with colours documented to be used by Eleanora di Toledo (as close to Purplish-violet I could find).
Right is the sample of linen
material for the sottana. This will be lined with wool felt
purchased from Spotlight, some time ago. The lining will be of the same
linen.
How much to use? (documenation) (22nd October)
The common loom width of material (in Florence) was
58cm, but looms wider than this are not unheard of for plain fabrics.
(satin, taffeta, maybe damask) La Moda a Firenze p 184. These are recorded from 73cm to 117 cm (2 braccia - one braccia = 58.8cm in Florence 16thC).
|
|
- velvets 2 braccia wide have survived
- 1499: 140cm wide velvet worked in Florence.
La Moda a Firenze
also gives examples of lengths of materials used for differing items of
clothing. eg. 17 braccia of velvet used for a 1544 sottana. At 58.8cm
per bracciam (p201), this would equate to approximately 10m of fabric.
Another 1544 sottana used only 6 1/2 braccia of velvet (p202). This
would be approximately 3.8m of material. Unfortunately, the
contemporary listings do not state the widths of materials used.
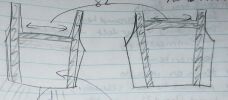
What was the Thinking Behind That?
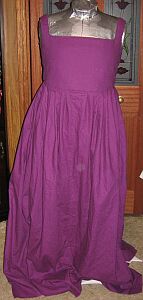
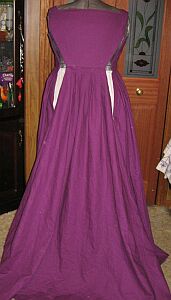
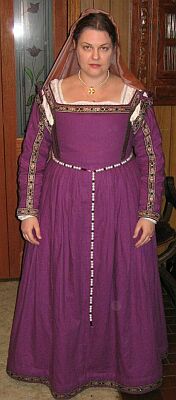
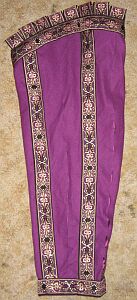
Right is my version of the 'Eleanora di Toledo' dress from Eleanora and her Son by
Bronzino. I am happy with the fullness of the skirt back, but feel
there is not enough pleating in the front (middle right). I used
approximately 6 m of material in this dress.
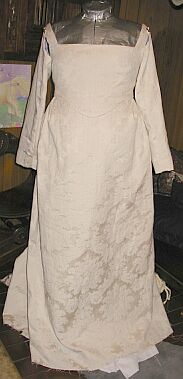
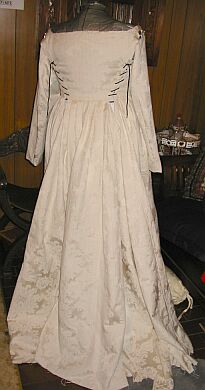
The extant sottana from Pisa (far right), though reconstructed by modern scholars, shows a more gathered front skirt.
Personally, I like the look of more material. It hides a multitude of
sins (for modern sensibilities) and, in the 16th century, would have
shown that I could afford to wear more materials in my skirt. implying
that I belonged to a higher class. Conspicuous consumption showed your
wealth at the time. |
 |
 |
 |
For this dress, I am using 135cm (2 1/3 braccia) wide material. This
loom width is not unheard of (though most likely not used for linen - a
little poetic liscence on my side). To make the front more full,
I will be adding another length (1.5m) of material of the full loom
width to the front. This would bring my total material consumption to
approximately 7m of 135cm wide linen.
This would also create a centre front seam, that is consistent with
both Eleanora's burial sottana and the sottana from Pisa. I am
confident that this will bring me closer to a more accurate pattern
used at the time.
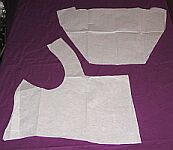
Pattern: (discussion and documentation)
With the exception noted above, I will be using the patten I have already used for my recreated version of Eleanora di Toledo's sottana and Maria d'Cosimo's sottana. However, I will be adjusting the waistline.
Though difficult to see, in this portrait of Guilia Gonzaga by Cristofano dell Altissimo (right), it appears that the
front waistline may not as peaked as Eleanora's burial dress and
definately not as much as the Pisa extant dress. (both from the 1560s)
This sottana is some 20 plus years earlier.
(Note: I have lightened the picture to try to allow us to see the details more clearly)
The sottana also seems to have the higher waistline of the 1530s and
early 1540s. My personal preference is actually for the slightly higher
waists, as they are more (modernly) flattering, but more importantly
are much more comfortable for me.
|
 |
   |
Other similar early styled sottana are:
1.Portrait of Lucrezia Pantciatichi, 1540 (though contemporary larger baragoni - upper sleeves, skirt pleating is different)
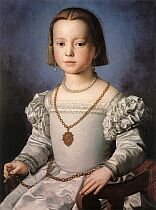
2. Bia, the Illigitimate daughter of Cosimo, 1542 (Bronzino)
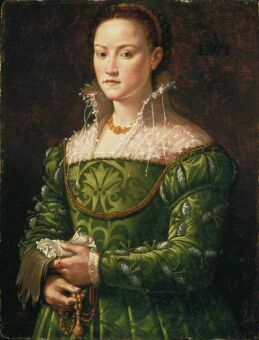
3. Unknown Florentine woman (Bronzino)
1544-45. This is a little harder to see the actual waistline, but
looking at the arrangement of the pleats, I am sure it is straight.
These are actually from the 1540s but closer in style to Cristofano
dell Altissimo's portrait than the other 1530's styles. This
would tend to show that styles are forever evolving! (or the experts
have misdated the portrait?) |
h: 171px; height: 150px;" alt="" src="pics/LINFLNeck1.jpg">
|
 |
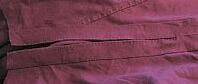
31st October:
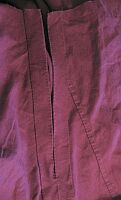
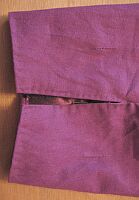
Here are pictures of the finished neck edging, now clipped. I have not
used anything to help reduce fraying (I have heard beeswax could be
used), so this is an experiment in how well it holds up. Cutting the
edging on the bias should help. Interestingly, the slight fraying looks
very similar to the red dress (below right) from the portrait
of Lucrezia Panciatichi.
So I am happy with this result, so far. (far right) |
|
 |
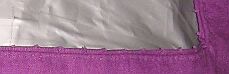
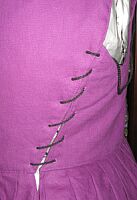
1st November:
Patterns of Fashion states
that the skirt openings are finished with satin bias strips approx.
22.4 x 2.5cm, which were top stitched in place. (p104).
From this, (as I have previously done with my Maria d' Medici outfit),
I finished the skirt openings with bias of the same purple linen
material. I used running stitch to 'topstitch' the edge, and hem
stitched the other side down. (right).
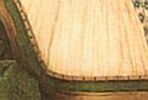
Skirts/ Faldagia
Now for the trickiest part (and the bit I hate the most) but one of the most important ones - the pleating.
This needs to be done correctly or the sottana skirt will not sit
properly. |
 |
 |
(I do the calculations and each time end up having to do it
by eye with trial and error!)
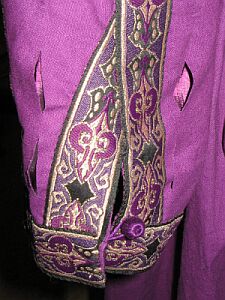
Sleeves: Diary
5th-6th November:
Before starting on the sleeves, I needed to do a little experimenting.
As there will be significant slashing, between the trim, I wanted to
find out the best way of reducing the inevitable fraying that will
occur during wear. This sottana is to be washable and I did not want to
have to sew or bind the edges of the slashes, as this is not seen in
the red Pisa dress.
RESULTS of my EXPERIMENTS are HERE
After experimenting, I decided to cut the slashing after applying a
line of fabric glue on the back of the material. I had already decided
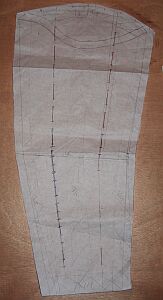
to cut the sleeves on the bias, as this is known to reduce fraying.
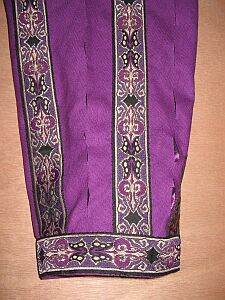
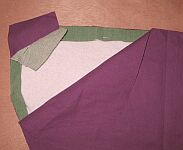
Right is the sleeve pattern with the positioning of the slashes. The
trim was handsewn to the sleeve.
I lined the
sleeves with a tafetta, to reduced the 'drag' on the slashing when
putting the sleeves on and off. This was handsewn with running
stitches. Far right is a finished sleeve (minus the pearls). |
 |
 |
 |
11th November:
Here is a close up of the running stitches before the trim was hand
sewn on (right) and detail of the sleeve trim and slashing (far
right).
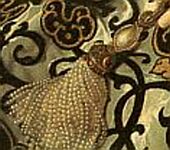
In my stash, I have some pearls I
purchased at Festival, from Master Thorfin. I will use this to finish off
the trim, as seen in Bronzino's 1551 portrait of Maria de Medici.
|
 |
 |
11-12th November:
   |
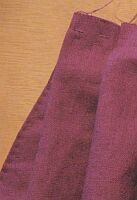
Eyelets now had to be sewn, as I could not finish off the hem, stiffening, edging and trim without the sottana fitting properly.
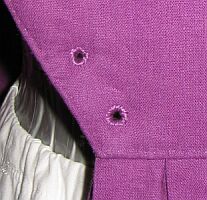
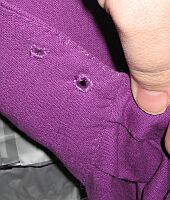
The
eyelets holes were made with an awl and hand bound in embroidery
thread. I do not use boning (between the edge and eyelets) as I can
find no documentation for the first half of 16thC (Florence or England
for that matter) on this method. I find that using spiral lacing
provides a flat profile by itself.
Far Left; front of eylets. (here you can also see the running stitches.) Middle: back of eyelets (you can also see the hemstitched lining). Left: final spiral lacing |
Construction of Hem stiffening, decoration (documentation).
According to both La Moda a Firenze and Patterns of fashion, the
hem of Eleanora d'Toledo's burial gown had stiffening at the hem to
help hold it out. This was a band of felt, covered by a satin
strip. This is confirmed by the red velvet extant dress from Pisa,
discussed in La Mode a Firenze.
Patterns of fashion states
that the 'matching' satin bias strip was 8.8 - 10.1 cm wide. This
covered the band of wool felt. Approximately 25-28mm above the edging,
is a 13mm wide pintuck. This can be seen on Eleanora's burial sottana.
This may also help to stiffen the hem.
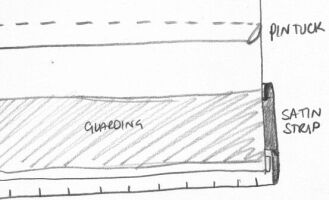
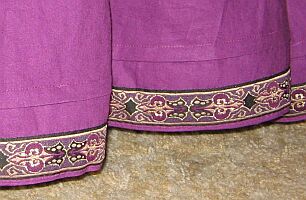
Hem stiffening - (diary)
November 13-17th
Once the sottana was able to be
laced up, the
hem could be measured up. The final hem consists of the felt
strip, the
bias material (I substited linen) strip which is clipped, the garding
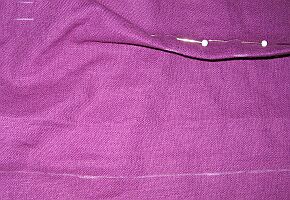
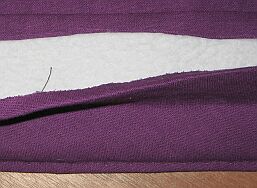
(trim) and the pin tuck above it. (see below left) Next, I
had to add 26mm to the pinned hem, to allow for the pintuck (seen below
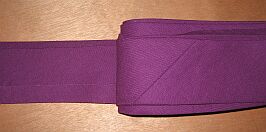
middle). The bias strip was made from the same material as the
dress (below right).
The bias strip
was sewn to the bottom of the hem, with a 3mm overlap which will be
clipped to give the same decorative effect as the neckline. This was
handsewn in running stitch (below right). The felt strip was inserted
underneath this bias strip (below middle). The bias strip was then sewn
over this, using hem stitch. Finally the trim was sewn onto the front.
(below right). All that is left is to clip the edging.
Deocoration - discussion and documenation:
 |
Typically, the sottana was made, then sent to the embroiderers (for decoration) afterwards (Dressing Renaissance Florence).
Now that the sottana is finished, I can have the ... fun... of more
handsewing on the trim. (this is one thing I have learned... more
authentic means more handsewing!)
I had purchased this trim, a few Festivals ago, but only bought 4.5m...
I have learnt a few things since then. After being frustrated and
refusing to buy alternate trim (as I was trying to use up my stash of
materials and trim here), I found another 10 (yards) on ebay.
This will allow me to do more than just the imbusto trim (thank
goodness) but also the hem (to cover the felt stiffening and stitches),
and the sleeves. |
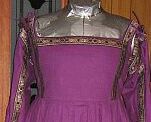
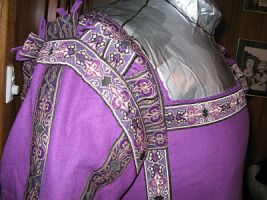
Decoration by the portrait: (documentation)
The portrait of Guilia Gonzaga is
very simple and not decorated, as she is in mourning. Brown was the
colour of mourning at this time, in Florence. Decoration and
accessories were minimal.
Bronzino's portrait of Eleanora (1542)shows
a more common placement of trim on the imbusto. I have used this and
the above examples, though some 5 years later, as they are of a closer
style to
the transitional sottana than other styles in the 1530s.
|
 |
 |
 |
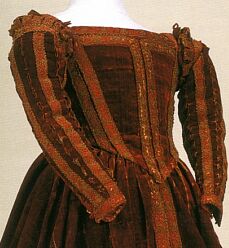
This can also be seen later in the two available extant dresses have
similar trim placings. The third picture shows no front skirt trim here
at later time (Bronzino:
Portrait of Lucrezia Panciatichi,1550-recently
attrib as possibly
Eleanora, (because of girdle) - this is a typical Eleanora
outfit.) and no centre front trim on imbusto... I will be using
this style of trim placing
(see diary below).
 |
Left is Janet Arnold's drawing of Eleanora's burial dress, form Patterns of Fashion. This
gives us the opportunity to see the back of the trim placing on the
imbusto. The main difference between both extant dresses (early 1560s)
and the 1540 examples, is the middle front trim.
The sleeve trim is very similiar in Bronzino's portrait
of Eleanora (1542) (above left) and the extant dress from Pisa (above
right), with verticle trim down the sleeves, and the baragoni. The
extant Pisa sottana has trim around the cuff. This is cannot vbe seen
in the Portrait of Eleanora.
10th November:
Ah! This is where one finds that one has not
bought enough trim, even after a second buying spree. I will need 3
more yards to trim the imbusto.
|
Decoration (diary)
18-19th November:
Finally I am sewing on the decorations and final touches!
I am using the trim placement (right) for the imbusto, trim on the hem (HEM DIARY) .
The trim was handsewn in place. (next time I will buy at least 15m of trim for this style.
Just when I thought I was done... I remembered I had to make two buttons! |
 |
 |
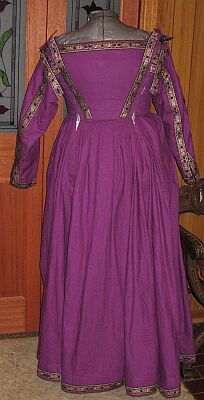
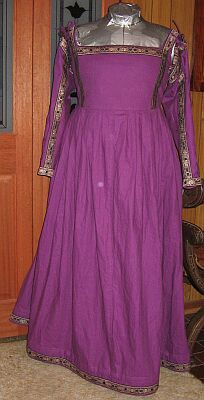
The Dress is finally finished to wear (with only the pearls to sew on
the trim, if I get time). Here are some pics... before the accessories
are finished.
Back, Front, sleeves and ties, button , hem and pintuck,...
 Accessories:
18th October:
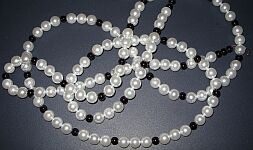 |
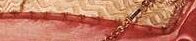
Agneta, my apprentice sister,
came over today and we spent the day sewing and making girdles. Left is
the new girdle for this outfit. It is made from chocolate brown glass
beads (from ebay) and glass 'pearls'. The faux pearl industry was a big
one in the 16th century. Venice had a roaring trade in glass pearls.
This allowed those who were not allowed to wear pearls, to wear
something that looked like pearls but not have to pay the price
for breaking the sumptuary laws. Agneta showed me how to make a
bead tassel, as right (Eleanora and Son, Bronzino) |
 |
|
Zimarra.
A common 'accessory' in Eleanora d'Toledo's wardrobe, was
the loose gown or Zimarra. This became more popular as the 16thC
progressed. My inspiration, above also has a zimarra to complete the
outfit. I was not sure if I would have time to get this finished before
the 'big night'.Due to the help of my apprentice sister, Lady Agneta, I did! (she helped me with sewing the lining - thanks!)
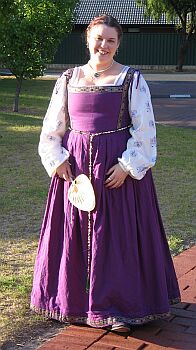
The Finished outfit:
With the sottana, girdle and Zimarra finished (at 12.00pm
the night before - I was at a work conference on the day before and the
day of the event!!), I added a silk veil (women married for more than
one year were required to wear veils in Florence, on and off depending
on the sumptuary laws of the time), pearl necklace with pendant,
stockings and shoes, the outfit was complete.
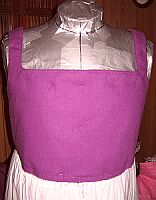
Underthings:
When I tried on the sottana, there was still creasing in the bust area.
I have lost some weight since I made the toile. I used my stays
to help stiffen the final shape. This worked very well. I was tempted
to use my metal boned corset, but wanted to keep this outfit as
period-acurate as I could.
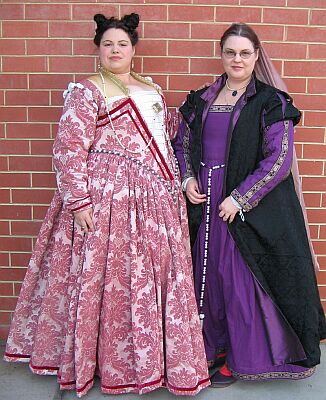
These pictures were taken on the night of the Innilgard's 20th
Anniversary of becoming a Barony. Thanks to Lord Dafydd and Lady
Fionnbhair for taking the photos. (you can tell the first 3 were taken
after the event!) Right; Lady Agneta and myself (with Zimarra) at the
event.
 And sleeveless on a very hot day, seen at the Newcomers Feast 2007.
What I have learned/ Features achieved on this project:
I found this sottana much more comfortable to wear than my Maria or Eleanora
recreations. With this toile, I adjusted the armhole/armscythe slightly
forward so it did not cut into my arms at the front. This was very
successful and also meant I had much more arm movement in this outfit.
The waiistline was also higher. With my body shape, this made the dress
sit much flatter and was more comfortable as well. The period hem
construction did really make the skirt stand out. I am not wearing a
farthingale - only an underskirt. The layering of the imbusto also
helped to provide a smoother, flatter looking silhouette. I made the
neckline higher than my previous attempts, at this style. This again
was much more comfortable and more in keeping with the portraits seen
of the time. This also meant I was not constantly doing the 'Captain
Picard' and pulling down the dress and stays. In the Eleanora and Maria
sottanas, the lower neckline meant that the stays would occasionally
creep up and peek out. (I am intending on making new stays with a
'longer waist', as seen in La Mode a Firenze. This is more accurate and should also help to reduce the riding up effect.
I love the sottana / zimarra combination. This outfit was definately
the most comfortable of my later Florentine sottana and much more
practicle to wear.
My goals achieved:
imbusto of four layers - visible material/ wool felt/ linen/ lining of linen or satin using :
- outer linen layer,
- stiffened material( cotton canvas) layer,
- wool felt layer, and
- linen lining layer.
|
 |
| handsewn silk covered eyelets |
|
| spiral lacings on side-back openings on imbusto |
|
lining hemstitched to main imbusto
|
|
lining or strip of decorative (cut) edging to neckline, cuffs and hem.
|
|
| hem stiffened with wool felt, decoratively edged strip covering this |
 |
pin tuck above the hem and
garding (of bought trim) |
|
bias strip hem stitched to skirt opening at side back.
This was done in the same material as the dress - hand sewn with running top stitch and hem stitch. |
|
|
|
| sleeves with small decoration on head (so Zimarra can be worn over to complete the outfit)and slashing, tied or buttoned onto the imbusto |
 |
patterns based on Eleanora's burial gown and Alcega's Tailor Book
The waistline was adjusted to a higher position (to the later patterns of Eleanora's burial gown (1562) and Alcega's Tailor Book (1589) ) to reflect the earlier fashion. |
 |
| The colour is consistent with colours documented to be used by Eleanora di Toledo (as close to Purplish-violet I could find). |
 |
Glossary
baragoni - puffy top of sleeve
imbusto - bodice
sottana - petticoat or dress.
zimarra - loose gown over sottana. This was originally based on turkish
coats but later came to encompass 'generic' loose gowns worn in
Florence.
Bibliography:
- Alcega, Juan.The Tailor's Pattern Book, 1589 Facimile, Ruth Bean, Carlton,
Bedford, 1979.
- Arnold, Janet Patterns of Fashion, MacMillan, London, 1985. ISBN: 0-333-38284-6
- Kovesi Killerby, Catherine, Sumptuary Law in Italy 1200-1500, Oxford
University Press. NY. 2002. ISBN:0-19-924793-5
- Crowfoot E, Pritchard F & Staniland K, Textiles and Clothing
1150-1450, Boydell Press, Woodridge, 2001 (ed) ISBN: 0-85115-840-4
- Frick, Carole Collier. Dressing Renaissance Florence.: Families Fortunes
& Clothing. John Hopkins University Press. Baltimore. 2002. ISBN:
0-8018-6939-0
- Orsi Landini, Roberta & Niccoli, Bruna. La Moda a Fioenze 1540-1580.
Pagliai Polistampa, Firenze, 2005. ISBN: 88-8304-867-9
- Veccellio, Cesare. Vecellio's renaissance Costume Book. Dover
Publications. NY. 1977. ISBN: 0 48623441X
Web
Sites:
- Medici Archive Project: www.medici.org/ (1/06)
- Web Gallery: Medici portraits by Bronzino. http://www.kfki.hu/~/arthp/html/b/bronzino/1/index.html
- Archeological Sewing by Heather Rose Jones (2001) http://heatherrosejones.com/archaeologicalsewing/index.html (new adsottana: 8/06)
- Sewing Stitches Used in Medieval Clothing: http://www.personal.utulsa.edu/~marc-carlson/cloth/stitches.htm
- Archive of Stitches from Extant
Textiles.
www.bayrose.org
All intellectual content, photos and layout are copyright to La
Signora Onorata Katerina da Brescia (K Carlisle), except those
original renaissance artworks and extant articles whose copyright
remains with the current owner.
If you would like to use something from
this site, please contact me, and cite this website reference.
(c) K. Carlisle. 2006